192.168.l.1
 192.168.l.1 Login Admin
The IP address 192.168.1.1 is widely used for accessing the admin console of Wi-Fi routers, designated by many manufacturers as the standard entry for configuration adjustments. Users aiming to change their Wi-Fi network’s name or password must navigate to this address to access the router’s settings panel, allowing for essential modifications to enhance network functionality and security.
How to Find 192.168.l.1 Admin
Attempting to log into your router using the IP 192.168.l.1 will be unsuccessful! Both http://192.168.l.1 and https://192.168.l.1 are incorrectly formatted IP addresses, and thus cannot provide entry to your WiFi router. To get access to your home network, click the big button provided below or enter “192.168.1.1” directly into your web browser’s address field.
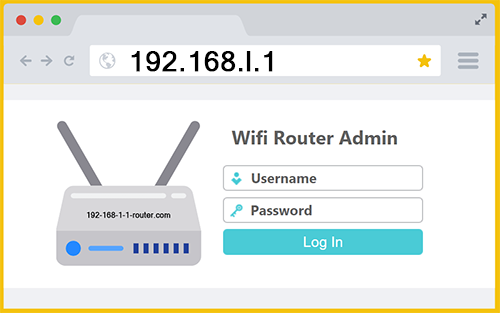
Most common username: admin
Most common password: admin or password
Generally, it is possible to gain entry to your Wi-Fi router’s administrative dashboard using any device that has established a correct connection to your network. This broad range of devices spans from iOS and Android smartphones to iPads and other tablets, as well as desktop computers and laptops operating on Windows or macOS. A common practice when attempting to access the settings of a home router involves navigating to the IP address 192.168.l.1. However, this particular address doesn’t work which leads to confusion for many users.
192.168.1.1 vs. 192.168.l.1
If you want to log in to your router as admin, you should use IP address 192.168.1.1 which is correct. A common typo of this IP is 192.168.l.1 which is wrong. Can you spot the mistake? The third element is the letter “l” instead of the numeral “1”, which means it is not a valid Internet Protocol address and thus won’t lead to the admin login page for your router.
How to Change Your WiFi Name
Changing your router’s Wi-Fi name, or Service Set Identifier (SSID), is a great way to personalize your wireless network and make it easily identifiable. Here’s a general guide on how to do it:
- Access the Router’s Admin Interface:
- You need to log into your router’s administrative interface using a web browser. First, type 192.168.l.1 into your web browser address bar and press “Enter” button on your keyboard
- You might be prompted to enter a username and password. If you haven’t changed these from the default, they’re often something like “admin” for both fields, or “admin” for the username and “password” for the password. Check your router’s manual or the manufacturer’s website for the default login credentials.
- Navigate to the Wireless Settings:
- Once logged in via 192.168.l.1 admin, look for the wireless settings menu. The exact wording can vary depending on the router brand and model but look for terms like “Wireless Settings” or “Wi-Fi Settings”
- Change the Wi-Fi Name (SSID):
- Within the wireless settings menu found after the 192.168.l.1 admin login page, find the field labeled SSID or Network Name. This is where you’ll enter the new name for your Wi-Fi network. Be creative, but avoid personal information for security reasons.
- Save Your Changes:
- After entering the new name, look for an option to save your changes. This might be a button labeled “Apply” or “Save”, or something similar.
- Reconnect Your Devices:
- After changing your Wi-Fi name, your devices will no longer recognize the network under its new name. Consequently, you’ll need to reconnect them to the newly named network and enter your Wi-Fi password if you have one. If you have an iPhone, this is done by going to “Settings” > “Wi-Fi” > and selecting the wireless network you wish to connect to.
Remember, the exact steps can vary depending on your router’s brand and model, so consult your router’s manual or the manufacturer’s website for specific instructions tailored to your device.
Router Brands Using https://192.168.l.1
- Linksys – many Linksys routers use 192.168.1.1 as their default access point for the administrative settings
- Asus – a plethora of Asus router models use IP address 192.168.l.1 for router login
- Netgear – many older Netgear models use http://192.168.l.1
- TP-Link – several TP-Link router models use 192.168.l.1 as the default IP for administrative access
- Cisco – some Cisco routers, particularly those aimed at home use, use 192-168-l-1 as the default IP address
Internet Providers
Dozens of the top ISPs in the World use routers with a default IP of 192.168.1.1. Examples: Vodafone, Movistar, Verizon, Digi, Deutsche Telekom, Claro, Orange, TIM, O2, VNPT, China Telecom, Airtel, Telenor, Swisscom, MTN, JioFi, Viettel, NTT, PLDT, True Gigatex, Vivacom, 3BB, and Zain.
Security of 192.168.l.1 Routers
Owning a router comes with the responsibility of ensuring your Wi-Fi network is secure. It is smart to safeguard your home network against unauthorized access and potential cyber threats. Enhancing your network’s security can seem daunting, but by embracing the following best practices you can effectively fortify your network against intrusions from both opportunistic hackers and more sophisticated cybercriminals.
1. Master the Fundamentals
Understanding the foundational elements of network security is crucial. Familiarize yourself with key concepts such as IP Addresses, SSIDs (Service Set Identifiers), and MAC (Media Access Control) Addresses. Delve into your 192.168.l.1 router’s configuration settings to gain a thorough understanding of its interface. Develop the ability to discern authentic websites from fraudulent ones, which often mimic legitimate sites to harvest sensitive information. Acquiring this foundational knowledge is a critical first step in managing your network’s security personally.
2. Implement Robust Passwords
The importance of using strong, complex passwords cannot be overstressed. Opt for passwords that blend uppercase and lowercase letters, numbers, and special characters like !, _, @, and #. A secure password typically ranges from 12 to 15 characters in length. Avoid predictable choices such as your surname or other easily guessable information. Regularly updating your password is also wise, particularly in light of data breaches on platforms where your details might be registered. This precaution helps safeguard your information even if a breach occurs elsewhere.
3. Activate Network Encryption
Your router offers several encryption standards, including WEP, WPA, and WPA2. Due to vulnerabilities in the older WEP and WPA protocols, it is advisable to use WPA2 encryption to protect your network. This modern standard provides a robust defense against unauthorized access.
4. Employ MAC-Address Filtering
MAC-address filtering is a powerful tool for controlling access to your home’s WiFi network. It allows you to block or permit devices based on their unique MAC addresses. Although setting up this feature requires you to manually approve each new device, thereby ensuring that only authorized devices can connect to your network, the security benefits are significant.
5. Deactivate WPS Settings
Wi-Fi Protected Setup (WPS) offers a simplified way to connect devices to your network without manual configuration. However, despite its convenience, WPS is vulnerable to exploitation. Disabling WPS through the wireless settings in your router’s advanced setup menu is a crucial security measure.
6. Keep Your Router’s Firmware Updated
Manufacturers occasionally release firmware updates to address security vulnerabilities and improve functionality. Keeping your router updated ensures protection against exploitation through known vulnerabilities. While newer routers might update automatically, older models may require manual updates, necessitating periodic checks for firmware releases. You can update your router by going to 192.168.l.1 and clicking the appropriate button in the admin panel.
www.192.168.l.1 Error
IP addresses do not use the “www” prefix, which is associated with web addresses or URLs (Uniform Resource Locators) used on the World Wide Web to indicate a website. In contrast, an IP (Internet Protocol) address is a numerical label assigned to each device connected to a computer network that uses the Internet Protocol for communication. IP addresses, such as 192.168.1.1, are used for identifying devices on a network and facilitating their communication over the Internet or within a private network, without the need for a “www” prefix. For this reason, if you attempt to visit www.192.168.l.1 or https://www.192.168.l.1 it will fail, since your web browser is searching for a website instead of a local device.
When writing the IP address, make sure to not forget any periods. Erroneously formatted IP addresses such as 192168.l.1 and 192168l1 will not work. Even if you forget a single dot, such as 192.168.l1, or add a space such as 192 168.l.1 it will be interpreted as a search phrase not an IP by a web browser.
Admin Login Usernames & Passwords
To safeguard the 192.168.l.1 admin panel, access is secured with a username and password. Manufacturers typically set a router with basic default login credentials, anticipating that users will update them to more secure options promptly. Below are some common default login pairs for routers utilizing IP address 192.168.1.1 (which is different from 192.168.l.1). Please note: we have listed them starting with the most frequently encountered:
admin/admin
admin/password
admin/1234
user/user
admin/*blank*
root/root
Should these combinations fail to grant access, it’s probable that the login details have been altered to enhance security. Under such circumstances, resetting your router to factory settings can revert it to its original login credentials.
Http or Https?
Whether your router uses SSL (Secure Sockets Layer) or its successor, TLS (Transport Layer Security), for secure communication depends on the router’s model and firmware. Modern routers and their web interfaces typically employ these protocols to encrypt data between your web browser and the router’s admin panel, enhancing security by protecting the information from eavesdropping or tampering.
When you access your router’s admin panel through a web browser, you might notice “https://” at the beginning of the address, indicating that the connection is secured using SSL/TLS. However, the implementation of these protocols and the level of security can vary based on the router’s make, model, and the firmware version it’s running. If you go to http://192.168.l.1 and you are automatically redirected to https://192.168.l.1 it’s likely because your router uses SSL. If your router was built in the last 10 years, it’s almost a guarantee it supports SSL and if you visit https 192.168.l.l you should see the admin login page.
For the most secure experience, ensure your router’s firmware is up to date, as manufacturers release updates that can improve security features, including SSL/TLS support. If you’re unsure about your router’s use of SSL/TLS, you can check the documentation provided by the manufacturer or consult their customer support for more detailed information.