Bell Router Login
 Bell Internet Login Guide
Bell Canada provides a variety of routers specifically designed to accommodate the needs of their high-speed Internet customers throughout Canada. These routers, commonly known as gateways, integrate modem and router functionalities into one convenient device, simplifying the setup and management of home networks. To customize your Bell router’s settings, such as changing your WiFi network’s name, you’ll need to log in to the router’s admin panel.
How to Log Into Bell Router
Bell routers usually have a default IP address of 192.168.2.1. To access your Bell Internet router’s admin login panel, enter this IP address into the top of your web browser or click the blue button:
Likely username: admin
Likely password: admin
If this default password doesn’t work, check the back of your router as there may be a sticker with a unique password. You can find more detailed step by step instructions on how to log into a Bell Internet router further down the page.
Bell Router Login Instructions
Step 1: Connect Your Device to the Bell Router
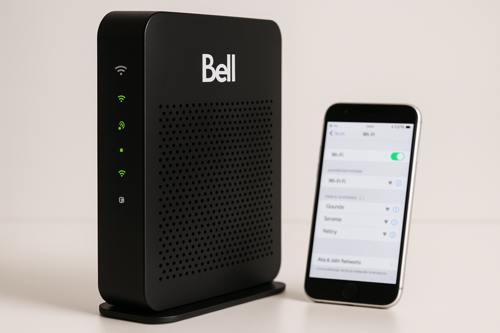
Before logging in, make sure your computer, smartphone, or tablet is connected to your Bell router’s WiFi network. Alternatively, you can use an Ethernet cable to directly connect your device to one of the LAN ports at the back of the router. An Ethernet connection usually provides the most stable and reliable access.
Step 2: Launch Your Web Browser
On the device connected to your Bell router, open your preferred web browser. Popular browsers such as Google Chrome, Mozilla Firefox, Microsoft Edge, or Apple Safari are all suitable. Ensure your browser is up-to-date for the best compatibility with your router’s admin interface.
Step 3: Navigate to the Router’s IP Address
Click on your browser’s address bar, clear any existing text, and carefully type in your Bell router’s default IP address. Bell Canada routers commonly use 192.168.2.1 as the default gateway. After typing in this IP address, press Enter on your keyboard or tap Go on your mobile device.
Step 4: Accessing the Bell Router Login Page
Upon entering the correct IP address, your browser should direct you to the Bell router’s admin login page. The login page will typically prompt you to enter a username and password. If you receive an error or the login page does not load, double-check that you typed the IP address correctly without any additional characters or spaces.
Step 5: Locate Your Router’s Login Credentials
Most Bell routers come with default login credentials printed directly on a label attached either to the bottom, back, or side of the router itself. Generally, Bell’s default username is “admin” and the password is either “admin” or a unique default password found on the router’s sticker. Look carefully for a sticker labeled as “WiFi information,” “Default Router Login,” or something similar. Ensure you note down any capitalization and special characters exactly as shown.
Step 6: Enter Your Login Credentials
Return to the login page in your web browser. Enter the username and password exactly as listed on the sticker or your router documentation. Be cautious of case sensitivity, as incorrect capitalization can cause a login failure. After typing in your credentials, click the “Log in,” “Sign in,” or similarly labeled button, or simply press Enter on your keyboard.
Step 7: Explore and Configure Router Settings
After successfully logging into your Bell router’s admin interface, you’ll gain access to various configuration options. You can now modify your WiFi network name (SSID), change WiFi passwords, manage security settings, see devices currently connected to your network, perform firmware updates, or configure advanced options such as port forwarding and parental controls.
Once you’ve completed your desired adjustments, be sure to click “Save” or “Apply” before closing the page to ensure all changes take effect immediately.
History of Bell Internet
Bell Canada, established in 1880, traces its origins to Alexander Graham Bell’s invention of the telephone. Initially, Bell transferred 75% of his Canadian patent rights to his father, Melville Bell, who began leasing telephones in pairs for private lines. This initiative laid the groundwork for Canada’s first telephone network. Under the leadership of Charles Fleetford Sise, the company expanded rapidly, becoming a cornerstone in Canada’s telecommunications landscape .
Today, Bell Canada stands as the nation’s largest communications company, offering a suite of services including high-speed Internet, television, and mobile connectivity. Its Internet services, particularly Bell Fibe, provide ultra-fast fibre-optic connections with speeds reaching up to 3 Gbps. Bell’s infrastructure covers over 99% of the Canadian population, serving provinces such as Ontario, Quebec, British Columbia, Alberta, Manitoba, and the Atlantic regions . Bell Internet, a division of Bell Canada, has 4.5 million high-speed Internet customers as of 2025. This makes it the largest ISP in Canada, similar to how Comcast is the largest ISP in USA.
Why Bell Routers Are Great
Bell WiFi routers offer several advanced features designed to enhance online connectivity and user experience. A key highlight is their dual-band technology, providing both 2.4 GHz and 5 GHz frequency bands to optimize Wi-Fi performance, speed, and coverage. Additionally, Bell routers feature integrated modem functionality, simplifying home networking by combining multiple devices into one streamlined gateway. Users also benefit from easy network management through Bell’s intuitive web interface, allowing quick adjustments to settings such as WiFi passwords, parental controls, and guest networks. Furthermore, Bell Canada routers support advanced security standards like WPA3 encryption, protecting networks from unauthorized access and potential threats. Finally, many Bell WiFi routers offer built-in compatibility with Bell’s Wi-Fi Pods, enabling seamless whole-home coverage, reducing dead zones, and providing consistently strong wireless signals throughout the home.
What is 192.168.2.1?
The IP address 192.168.2.1 is a commonly used default gateway for home and office WiFi routers, particularly for models provided by companies like Bell Canada. Classified as a private IPv4 address, it cannot be accessed from outside the local network or directly from the Internet. Instead, it’s reserved exclusively for internal use within a home or business network, facilitating secure and isolated communication among connected devices. Routers utilizing this IP address assign similar private addresses to other connected devices (such as computers, smartphones, and printers), thus enabling efficient routing of data within the network.
Users frequently utilize the IP address 192.168.2.1 to access the router’s administrative interface via a web browser. By entering this address directly into a browser’s address bar, users can log in to adjust settings, such as changing WiFi network names (SSIDs), setting or updating security passwords, configuring port forwarding, or implementing parental controls. Since this administrative interface manages essential security and connectivity functions, the IP address 192.168.2.1 is critical for users wishing to maintain optimal network performance and ensure the safety of their wireless network. You can learn more about 192.168.2.1 here.
How to Discover Your Bell IP Address
To find the IP address of your Bell router, you can start by checking the router itself. Most routers have a sticker placed on the bottom, back, or side that lists important network information, including the default IP address, username, and password. This address is usually something like 192.168.1.1, 192.168.0.1, or 192.168.2.1, depending on your router brand. Additionally, you can refer to the router’s user manual or the manufacturer’s website if the sticker is missing or unclear.
Alternatively, you can use your computer or smartphone to discover your router’s IP address. On a Windows computer, you can open Command Prompt, type “ipconfig,” and press Enter. Look for the line labeled “Default Gateway” to identify your router’s IP. On macOS, open System Preferences, click Network, select your active connection, and click “Advanced,” followed by the TCP/IP tab, where the router’s IP will be displayed. If you’re using a smartphone, such as an Android or iPhone, the IP can typically be found under your Wi-Fi network details in the Settings app. Using these straightforward methods, you’ll be able to quickly locate and log into your router’s administrative panel.
How Can I Reset My Bell Modem?
To reset your Bell router to factory settings, locate the reset button, usually found at the back or bottom of the device. The reset button is typically recessed within a small hole to prevent accidental activation, so you’ll need a thin, pointed object such as a paperclip or pin to press it. With the router powered on, firmly press and hold the reset button for approximately 10 to 15 seconds until the router’s lights flash or restart, signaling the reset is complete. Keep in mind that resetting your Bell router will erase all personalized settings (including WiFi network names, passwords, and customized configurations) returning it to its original default state as provided by Bell. After resetting, you can log back into the router using the default username and password printed on the router to reconfigure your network preferences.
Disclaimer: Any trademark or logo is property of its respective owner.